Asphalt milling is a crucial process in paving projects that ensures long-lasting, smooth, and durable surfaces. Also known as pavement milling or cold planing, this process removes worn or damaged asphalt layers, preparing the surface for repaving. Property owners and managers across Vancouver, Surrey, Burnaby, Richmond, Langley, Maple Ridge, and North Vancouver rely on professional asphalt milling services to extend pavement life and improve safety.
Step 1: Site Assessment and Planning
Every milling project begins with a detailed site assessment. Our team evaluates the condition of existing asphalt, identifies cracks, potholes, or uneven areas, and determines the appropriate depth and scope of milling. Proper planning ensures that the asphalt milling process achieves optimal results for driveways, parking lots, or municipal roads.
Step 2: Traffic Control and Safety Measures
Before milling begins, traffic control and safety measures are established. For commercial or public projects, barriers, signage, and detours are used to protect pedestrians, vehicles, and workers. Ensuring safety on-site is a top priority during the milling process.
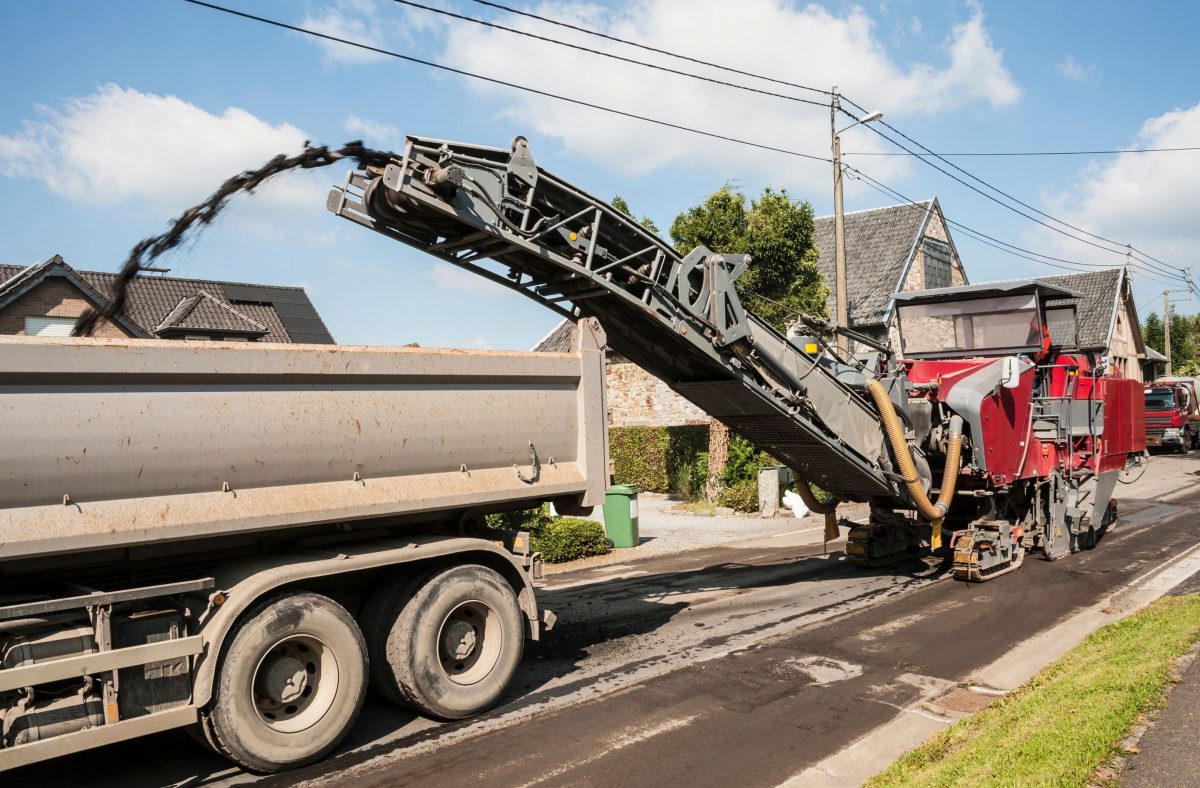
Step 3: Asphalt Milling Equipment Setup
Specialized milling machines, known as cold planers, are used to remove asphalt layers. These machines feature rotating drum assemblies equipped with carbide-tipped cutting teeth that grind and remove asphalt precisely. The equipment is calibrated based on project depth, surface type, and required finish.
Step 4: Asphalt Removal
The milling machine removes the top asphalt layer, typically between 1 and 4 inches, depending on the project. Removed asphalt, also called reclaimed asphalt pavement (RAP), is collected and transported for recycling or disposal. This step ensures a smooth, level base for the new asphalt layer.
Step 5: Surface Grading and Cleaning
After milling, the exposed base is inspected and graded to correct any uneven areas or slopes. Proper grading is critical for drainage and overall pavement performance. The surface is then thoroughly cleaned to remove debris, dust, and loose materials, creating an ideal foundation for resurfacing.
Step 6: Repairs and Base Preparation
If underlying layers or subbase materials are damaged, repairs are performed before repaving. This may include filling potholes, compacting weak areas, or stabilizing the base. Addressing these issues ensures the longevity and durability of the new asphalt layer.
Step 7: Repaving with New Asphalt
Once the milled surface is prepared, a new asphalt layer is installed. The fresh asphalt is laid, compacted, and smoothed using professional paving equipment. Proper compaction and finishing ensure a uniform, durable surface suitable for driveways, parking lots, and roads.
Step 8: Final Inspection
After milling and repaving, the pavement is inspected for smoothness, proper slope, and drainage. Any minor adjustments or touch-ups are completed to meet high-quality standards. The result is a safe, functional, and long-lasting asphalt surface.
Benefits of Professional Asphalt Milling
Professional asphalt milling provides numerous advantages, including:
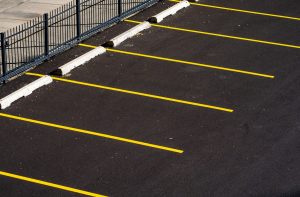
- Smooth, level surfaces for overlays and repaving
- Increased lifespan of asphalt pavement
- Reduced risk of cracking, potholes, and water damage
- Cost-effective preparation compared to full removal
- Recycling of old asphalt materials
Service Areas
Scandia Paving Ltd. offers expert asphalt milling, resurfacing, and repair services in Vancouver, Surrey, Burnaby, Richmond, Langley, Maple Ridge, and North Vancouver, providing durable, safe, and high-quality pavement solutions for residential, commercial, and municipal projects.